If you follow me on Instagram, you may have seen the cheery buds I picked up at my local farmer's market over the weekend. They were lovely -- yellow daffodils with lavender tinted wheat. But, the daffodils started to wilt, and the whole arrangement started looking pretty tired by today. Instead of tossing the whole thing, I decided to add some Valentine color to make it more festive for our family party this weekend.
Here's my big secret: I added a fake flower. After looking around my house a bit, I found a big, pretty fake peony in a box, and decided to add it to the arrangement. I also had some gerbera daisies that were pretty old. Two of the five were wilting, but the remaining three were in good shape, so I borrowed those to add more color. Finally, I grabbed a small bundle of red tulips at the store ($3 for 5 stems) and used three of them to finish off the look. I'm super happy with it, and with increased floral costs at Valentine's Day, I think this pretty little thing could sell for at least $30!
The Breakdown:
Greens: Part of the original arrangement, no new cost
Wheat: Part of the original arrangement, no new cost
Tulips: $1.80
Gerbera Daisies: From last week's flowers, no new cost
Peony: Already had, no new cost (sells at JoAnn for about $5).
Total New Cost: $1.80
Thursday, February 12, 2015
Monday, February 9, 2015
My Favorite Kids' Valentine Looks
Each year our daughter "hosts" a small Valentine's Day party for her grandparents at our house. We love celebrating them, and I love finding a cute outfit for her to wear. This year there were so many cute baby fashions, and I wanted to share some of the best deals with you!
For girls:
Here is what my little lady will be wearing to celebrate Valentine's Day this year.
Source: Old Navy
For girls:
Here is what my little lady will be wearing to celebrate Valentine's Day this year.
Source: Old Navy
Here is a little twist on the traditional red or pink. I love the sweet coral and gold, and I love that it is all on sale.
Source: Crazy8
Ruffles and lots of girly charm in this cute little outfit.
Sources: Old Navy and Crazy8
Posted by Dani at 9:00 AM No comments:
Thursday, February 5, 2015
DIY Art Print for Valentine's Day
This next project is so simple it feels a little bit silly to blog about. Have you ever seen those cute art prints commemorating families' milestone moments? I think they're super cute, but I've never put the time in to finding one I like, ordering it, framing it, yada yada yada.
So, instead of spending money and waiting for one to arrive, I thought I would take a swing at making my own -- with Word. I know, so crazy. But it worked, and I think it turned out pretty cute. Below is the easiest tutorial you will see on the internet today :)
Step 1:
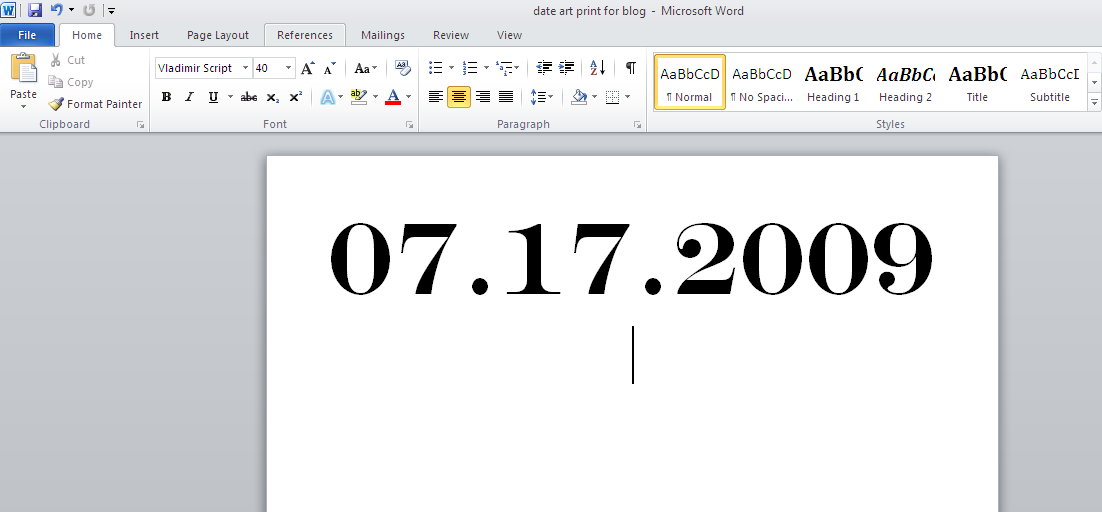
Open word and start a new document, with narrow margins (0.5" all the way around):
Step 2:
Select a large block font that you like (I used Engravers MT), and add your "first date" date:
Step 3:
Next, choose a script or fancy font that you like for the description:
Step 4:
Insert a heart. I chose red, you can chose any color you like or that works well with your decor.
Step 5:
Repeat steps 2, 3, and 4 for your remaining dates.
Step 6:
Print on your choice of paper. I chose to print ours on recycled kraft paper for a bit of a different look.
Voila! Now you have the easiest art print known to man. Throw it in a frame for a finished look.
Total cost: $0
Tuesday, February 3, 2015
Planning a Gallery Wall
Well, the winter germies finally visiting our house. My little lady and I are sick this week, so with the exception of a couple of quick errands, we have been home for a few days laying low. All that time sitting in our living room as made me decide it is time to switch up some wall decor, in the form of: a gallery wall!
Our current space:
I am looking around Pinterest, and trying to settle on a gallery wall that suits our style. As I showed in a previous post, we did a gallery wall in our daughter's room and we love it. Follow me on Pinterest, and let me know which gallery wall style you like best. I am so excited to share the results of this project soon!
Our current space:
My husband is obsessed with our sectional. He claims it is the most comfortable couch ever. I am not sure I will ever be allowed to sell it!
I am looking around Pinterest, and trying to settle on a gallery wall that suits our style. As I showed in a previous post, we did a gallery wall in our daughter's room and we love it. Follow me on Pinterest, and let me know which gallery wall style you like best. I am so excited to share the results of this project soon!
Saturday, January 31, 2015
Last Minute Menu Ideas
Tomorrow is the big day! The Seahawks take on the Patriots to see who will walk away the best team in the NFL. Such an exciting time to be a Seattle native.
We will be watching the game tomorrow at our place with family. After some consideration of traditional game day favorites (think chili, hot dogs, burgers, etc), I settled on serving pulled pork nachos. If you're looking for a last minute menu idea, I've included my recipe/ingredients. I hope you enjoy a delicious meal and cheer the Hawks on to victory! C'mon Jermaine Kearse!!
Pulled Pork Nacho Ingredients:
2 bags tortilla chips (I love Cabo Loco or Juanita's)
2 bags shredded Mexican blend cheese
2 8 oz cans of olives
1 container pico de gallo
1 lb (or more) pulled pork (un-seasoned - ready made from the store or crock pot, whatever suits your fancy)
3 large avocados (for guacamole)
1 medium onion, chopped and divided
1 bunch green onions
Garlic salt to taste
1 can jalepenos (optional)
Place the chips, cheese, pork, olives, green onions, jalepenos and about 1/2 of the onion together on a baking sheet. Bake at 350 until cheese is melted.
Mash avocado, garlic salt and remaining onion together in a bowl to create a nice, homemade guacamole.
Top nachos with pico de gallo, sour cream, and guacamole. Serve hot and enjoy!
Wednesday, January 28, 2015
Threads for the Big Game!
Like I mentioned in last week's post, we are getting SO excited to watch the Seahawks in the Superbowl this weekend! In place of this week's Thursday Threads, I'm sharing what I will be wearing as a loyal 12, including my lucky sparkle shoes ;).
What I'll be wearing:
Jeans: Joe's Jeans - Nordstrom
Sequin Polka Dot Tee - Old Navy
Seahawks Tee - Christmas gift last year!
Seahawks Hat - Pirated from my husband's closet
Gold Sparkle Shoes - TOMS
Let's Go Hawks!!
Monday, January 26, 2015
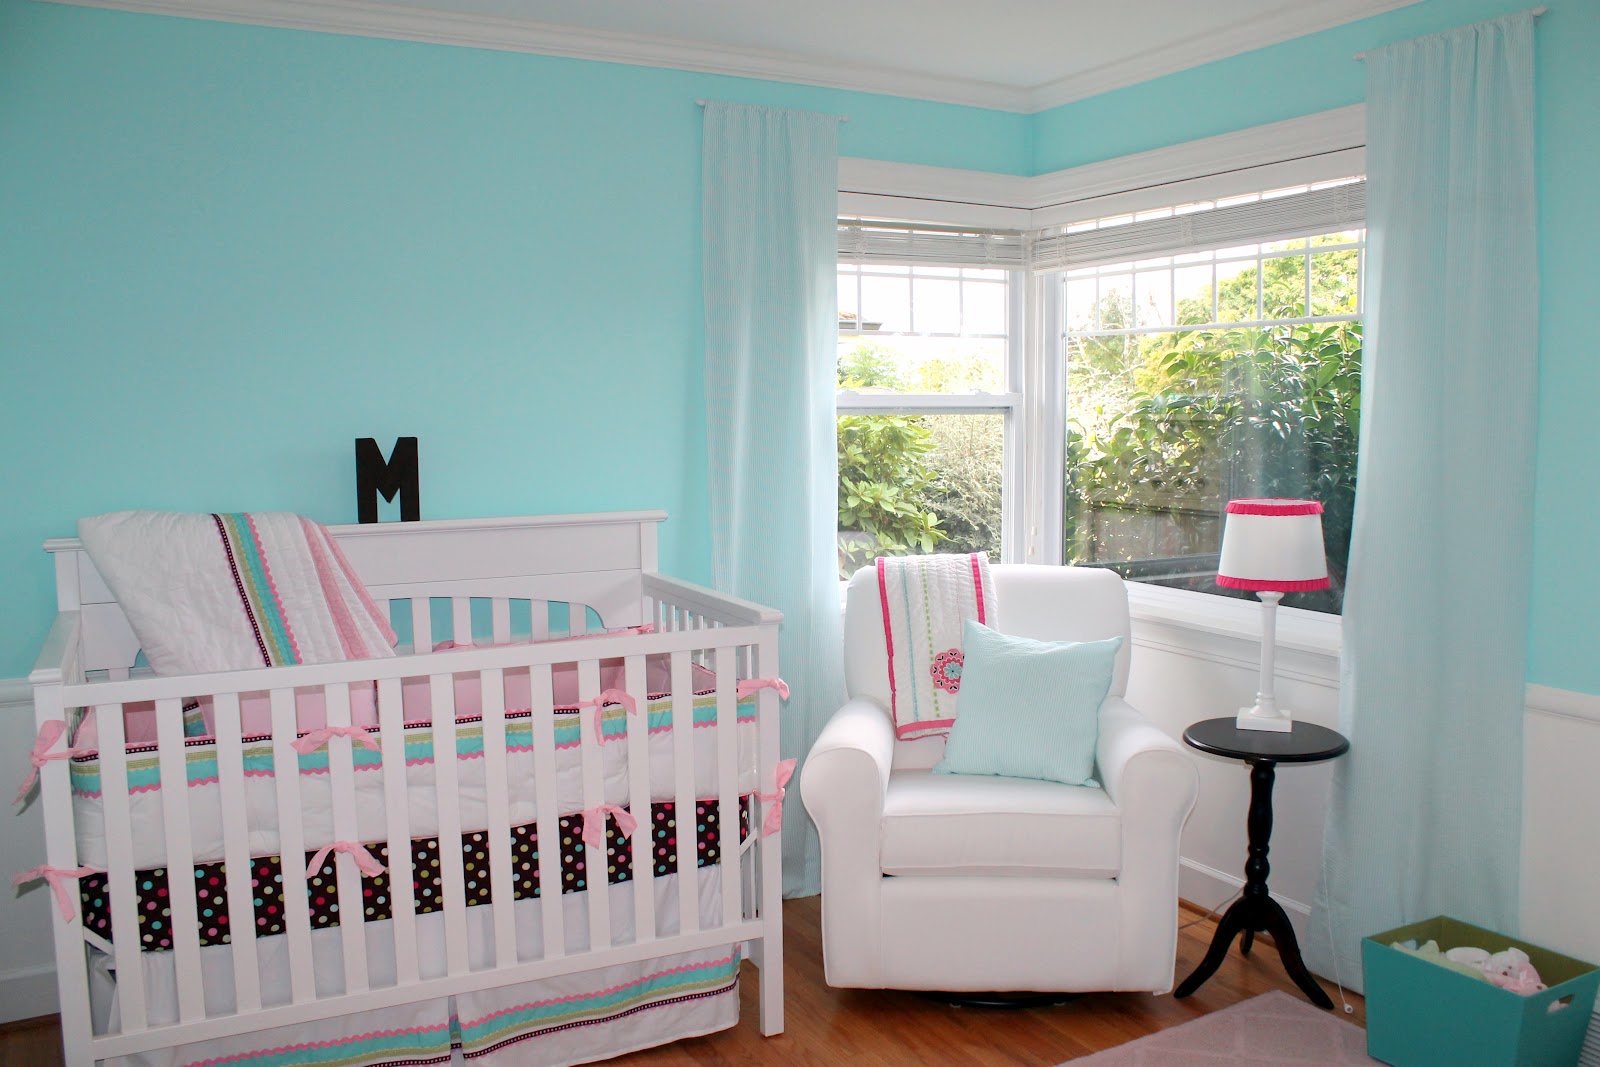
I really love my...daughter's nursery.
I have to be honest: I was never one of those women that really enjoyed being pregnant. The end DEFINITELY justified the means, but I distinctly remember listening to women talk about how much they loved being pregnant, or how they had never felt better, and thinking "yeah-freaking-right".
A few sources:
Bedding: Pottery Barn Kids
Rocking Chair: Hagen Swivel Chair by Best - Merry Go Round Children's Store
Side table: Home Goods
Dresser: Pali Salerno Dresser (floor model so we got a great deal!) - Merry Go Round Children's Store
Lamp: DIY
Mobile: Pottery Barn Kids
Rug: Pottery Barn Kids
Crib: Graco Lauren Crib
Mirror: Home Goods
Frames: IKEA, Land of Nod, Target
Art prints: Hobby Lobby, Etsy, and Jones Design Company
But one of my favorite parts of being pregnant was taking the time to design and (with the help of my mom) create a nursery for my baby girl that I absolutely loved.
M quickly outgrew a lot of aspects of this nursery, but I love having these pictures to remember exactly what it looked like when she came home from the hospital. Even now, as she transitions to a "big girl" room, the bright, crisp colors and the hanging paper birds make it such a peaceful room to read in with my littlest love.
A few sources:
Bedding: Pottery Barn Kids
Rocking Chair: Hagen Swivel Chair by Best - Merry Go Round Children's Store
Side table: Home Goods
Dresser: Pali Salerno Dresser (floor model so we got a great deal!) - Merry Go Round Children's Store
Lamp: DIY
Mobile: Pottery Barn Kids
Rug: Pottery Barn Kids
Crib: Graco Lauren Crib
Mirror: Home Goods
Frames: IKEA, Land of Nod, Target
Art prints: Hobby Lobby, Etsy, and Jones Design Company
Subscribe to:
Posts (Atom)


